Network Service Subscriptions
Network Service Subscriptions
Network Service Subscriptions are special service subscriptions established by the Enterprise Network Provider for use by eligible Network Providers. To find out if you are eligible to participate in a special service subscription, contact your Enterprise Network.
Eligible Network Providers receive an award letter with links to the information below detailing how to utilize this feature.
Assigning Network Service Subscriptions
2) Click once to select
the Active Client for whom you would like to designate a portion of the awarded funds & using the pop-over menu on the right, click the  button to be taken to the client record.

Should you need assistance creating a new client, please review
this KBA.
3) From the Client Record View, click on the

tab.
Then click on the  button.
On the Set Subscription Page, you will be provided with 2 types of subscriptions to choose from. For the purposes of this document, we are going to focus on the "Network Subscription" options.
The Provider Subscription dropdown will provide you with a list of Subscriptions that have been configured by your System Administrator and relate only to your organization's billing practices. This list should be ignored until you intend to bill the client directly for services received. For more information regarding Provider Service Subscriptions please review
this KBA.
4) In the dropdown menu beneath the Network Subscription Header, choose the subscription related to the Award Letter you received from your Enterprise Network.
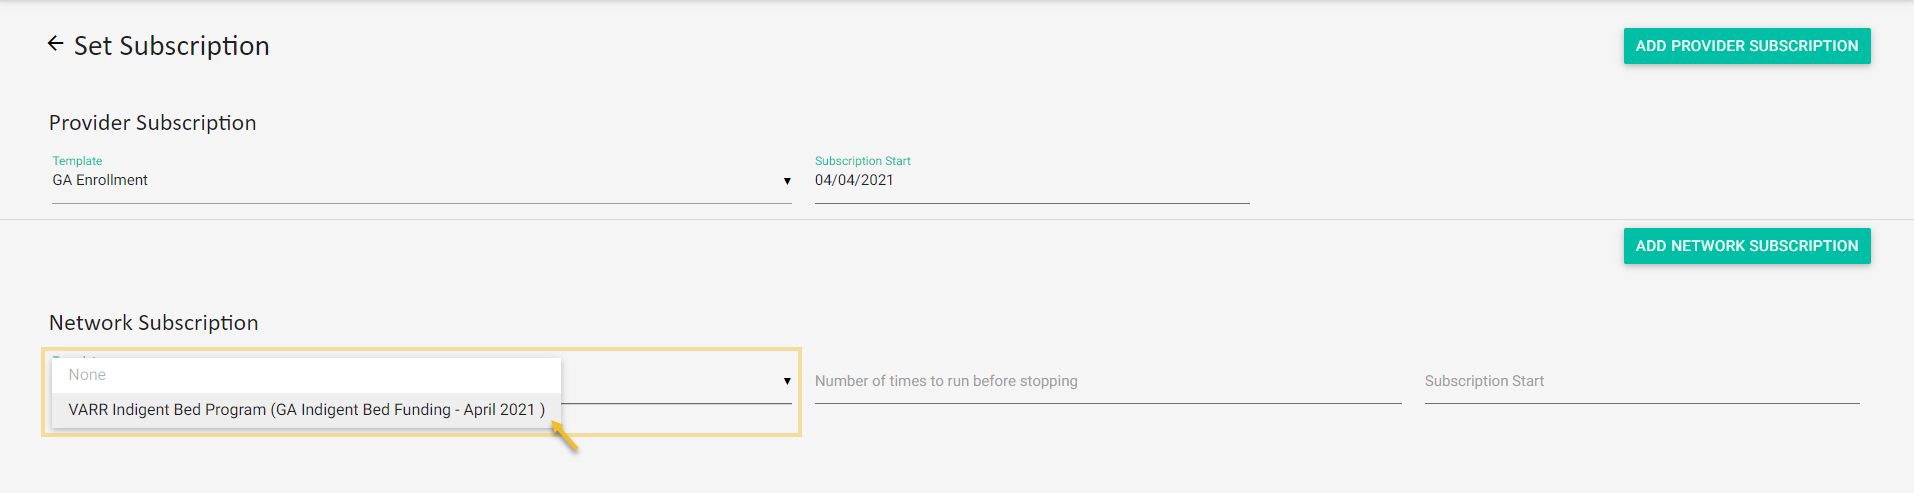

The Maximum number of times the subscription can run will be auto filled into the box once you have selected one of the Network Service Subscriptions.
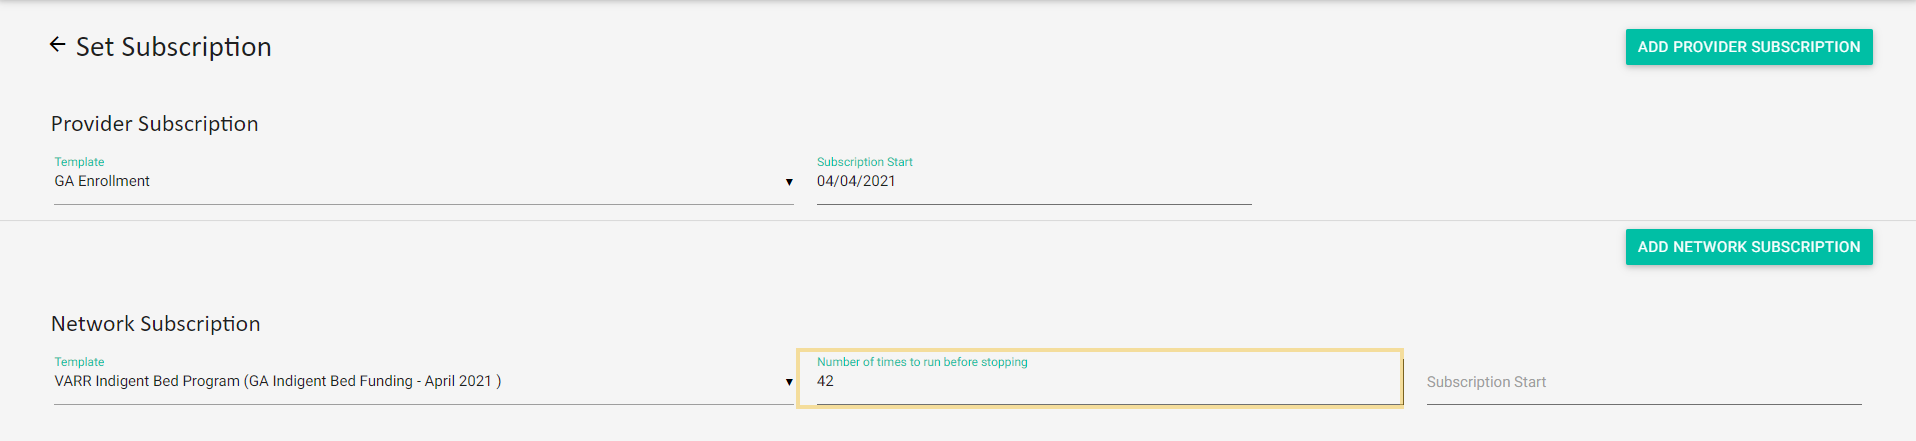
5) The highlighted field in the image below displays the maximum number of times that this Network Subscription will run. If your organization wishes to apply this network subscription for less than the period established by the Enterprise Network, then you may adjust the "number of times to run before stopping" to reflect a value less than the maxium that is displayed. You should think of this field as being limited to however many days you expect to provide a client with funds.
6) Use the "Subscription Start" date-picker to choose a date for the Network Subscription to begin.
7) Once you have
entered the number of times to run the Network Subscription (
Period) and selected a Subscription Start Date, click on the

button.
Click  to continue.
Since we selected today's date as the Subscription Start Date, the Subscription will enter 1 service to the client's ledger today and would then enter another service each day automatically for the next 41 days. After 41 days the subscription would expire and automatically stop entering services on the client's ledger. Check the Details & Examples section for a detailed breakdown of how these fields work.
8) Navigate back to the client's record and click on the

tab to see that the Service Subscription
successfully entered the service(s) on the client's ledger 1 time.
9) To see the details of the Network Service Subscription you just added for the client, click on the
tab and click on the Subscription anywhere in the highlighted box below.
Details & Examples

Fig 1. Details:
Provider Allocated Amount: The total amount awarded to you by the Network Provider.
Provider Utilized Amount: The total amount that has already been distributed to clients via the Network Service Subscriptions you assign to clients.
This means that we have assigned service subscriptions which have already run and entered the service onto the client's ledger.
Provider Committed Amount: The total amount that you have committed to distribute by setting the Network Service Subscriptions but has not yet been entered onto the client's ledger.
Remaining Amount: The amount leftover after accounting for amounts which have already been distributed and the amounts which are set to be distributed but have yet to process.
(Provider Utilized Amount + Provider Committed Amount) - Provider Allocated Amount = Remaining Amount
Assume that the table (Fig 1.) represents your provider amounts right before
assigning the subscription depicted in the steps above.
Fig 1.
|
|
|
|
Provider Allocated Amount
| Provider Utilized Amount
| Provider Committed Amount
| Remaining Amount
|
5,000.00
| 2,000.00
| 0.00
| 3,000.00
|
This table suggests that we have been awarded
$5,000.00 total and that we have already added service subscriptions to clients
in our ARMS Provider Portal. We know this because those existing
subscriptions have triggered enough service entries for each of the clients
assigned to them to have totaled our $2,000.00 Utilized Amount. We also know
that we have not assigned any new Network Service Subscriptions because our
Committed Amount is $0.00. This would leave us with $3,000.00 remaining to be
distributed.
(Fig 2.) represents what we can expect the provider
amounts to look like after setting the subscription detailed in the steps
above.
Fig 2.
|
|
|
|
Provider Allocated Amount
| Provider Utilized Amount
| Provider Committed Amount
| Remaining Amount
|
5,000.00
| 2,030.00
| 1,210.00
| 1,760.00
|
We set the Network Subscription to start Today
(04/04/2021) and it added 1 entry of $30.00 to the client's ledger which
increased our Utilized Amount to $2,030.00. Since we set the period to 42 and 1
of those triggered today, our Committed Amount is now $1,210.00 as it has been
flagged to be distributed but will not until the Network Subscription for this
client ends. Because we have flagged these funds to be distributed to this
client by assigning the Network Subscription, our Remaining Amount has
decreased to $1,760.00.
Back Dating Service Subscriptions
As a Provider, you can set the Network Subscription Start Date to any time in the past in order to get an accurate account of when the client began receiving appropriated funds.
1) When selecting a Subscription Start Date, use the date-picker to choose whichever prior date accurately reflects when that client was authorized to receive funds.
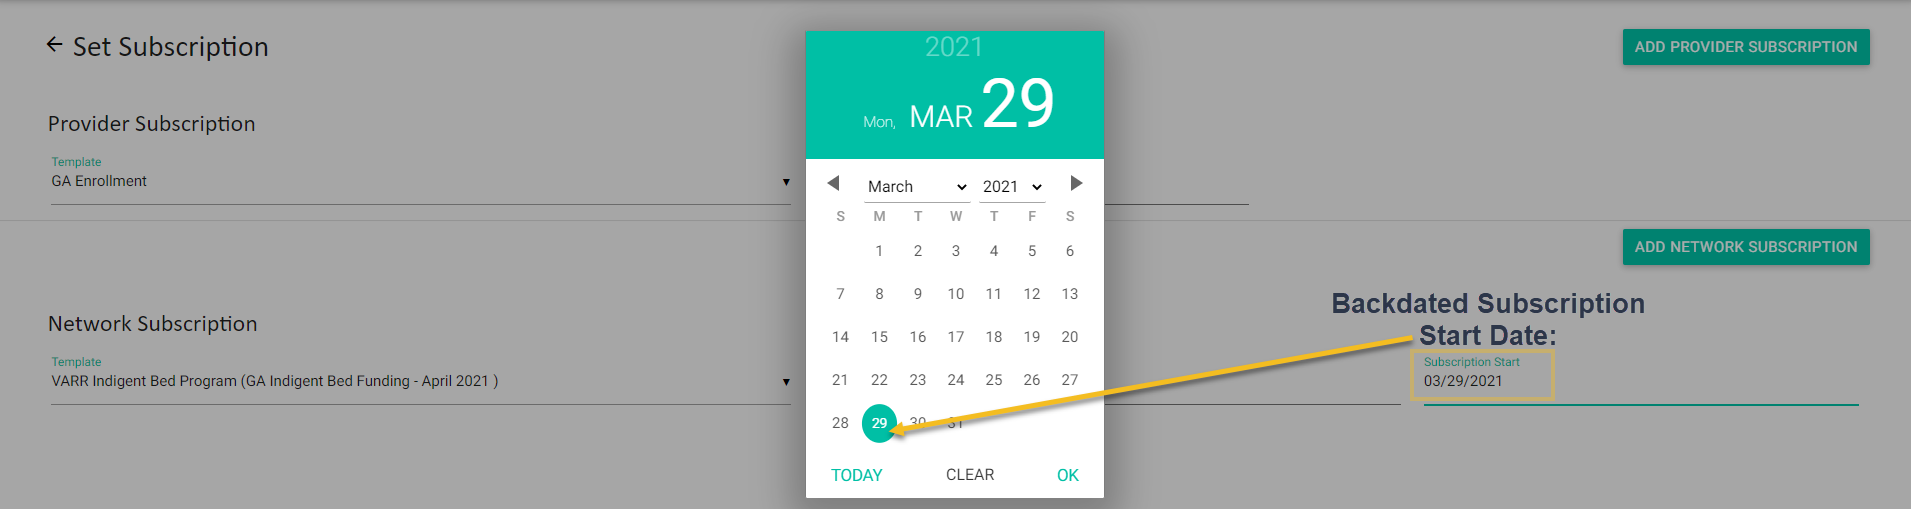
For example, if a client began receiving funds on Monday March 29, 2021 then I would make the selection in the date-picker as shown above and click on the OK icon. The result of this would be a service entry for each date up to an including today, thus an accurate reflection of distributed funds.
2) After selecting the appropriate date, click on the

button, then click
to proceed.
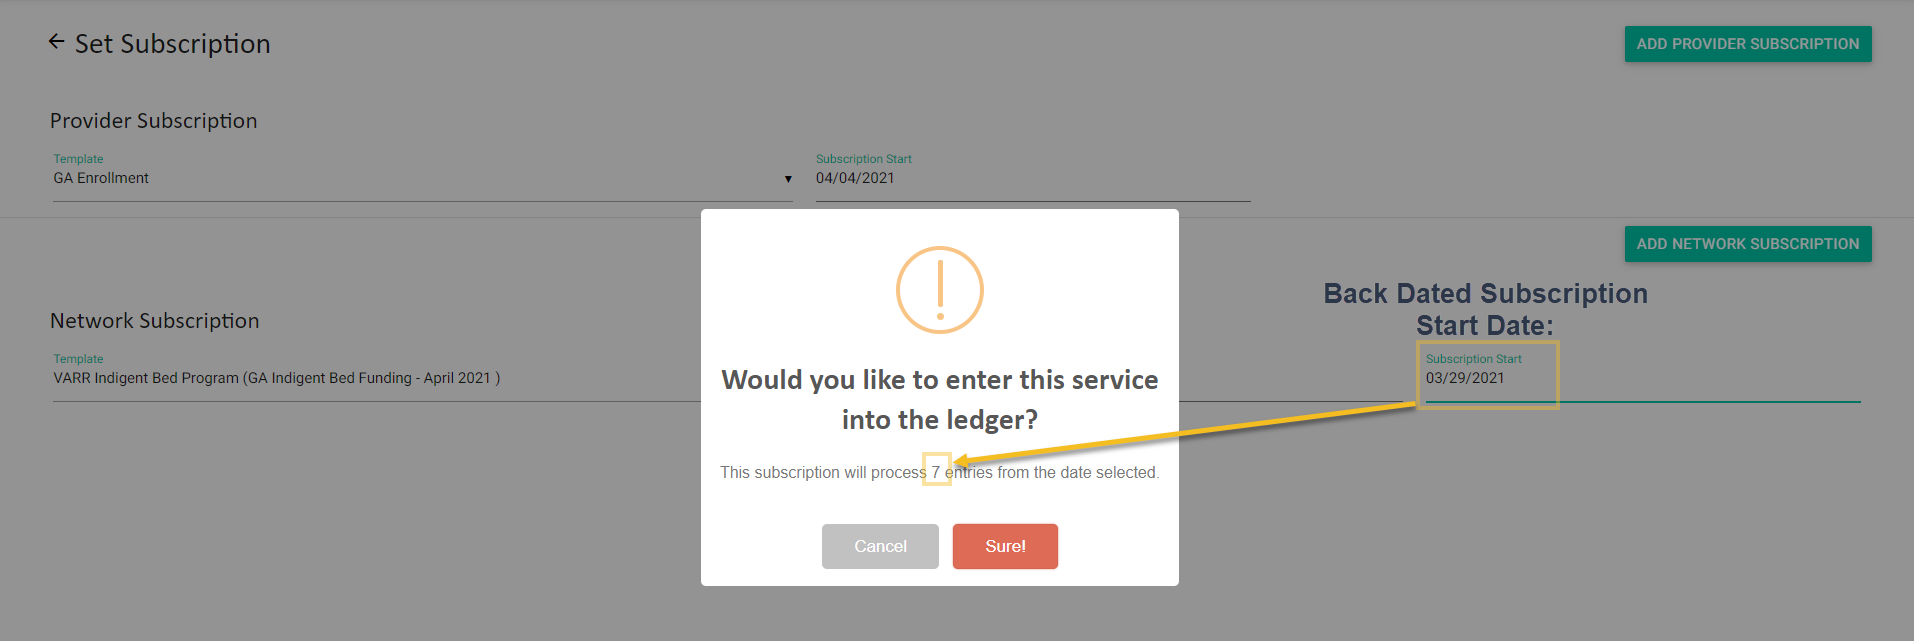
This subscription will make ledger entries for the 7 days prior to today's date and continue to run based on the period you set or it is manually stopped.
Ending Network Subscriptions Early
There are a number of scenarios where a Provider user might wish to end a Network Subscription for a client Early. One example might be that a client has met their goals early and no longer needs to utilize any of the funds that you appropriated to them while initially setting up their Network Service Subscription. To do this follow the steps below.
1) Select the client from the Clients View, navigate to their Client Record and click on the
tab.
2) Select the Active Subscription that you wish to stop early by clicking it anywhere in the area highlighted in the image below.
In the event that the client has more than 1 subscription, multiple will be listed. Active subscriptions have a normal font and black text while Inactive Subscriptions will be Italicized and grayed out.
3) Click on the

button in the lower right hand corner of your screen to Stop the Subscription.
Related Articles
Service Subscriptions
A service subscription will automatically charge your clients according to the timeframe you create. For example, let's say you charge $150.00 per week for rent. You can create a service subscription that automatically charges the clients you assign ...
How do I charge a client for services?
To add a charge to a client ledger 1. Login to your ARMS account and navigate to the top left hand corner of your screen to select the menu button 2. In the side menu select 'Clients' and choose the client you would like to charge 3. Select the ...
How do I apply cash payments?
To apply a Cash payment for services 1. Go to the Staff Backend Portal https://arms.recoveryoutcomes.com 2. In the sidebar menu select "Clients" --> "Active Clients", and select your client 3. Select the "Account" tab, beneath the client image 4. ...
How do I apply credit card payments in the Staff Backend Portal?
To apply a credit card payment to a client ledger using the Staff Backend Portal 1. Go to the Staff Backend Portal https://arms.recoveryoutcomes.com 2. In the sidebar menu select "Clients" --> "Active Clients", and select your client 3. Select ...
Issuing Client Portals & Resetting Passwords
Issuing Client Portals Clients interact with the Advanced Recovery Management System (ARMS) through what is known as the Client Portal. Portal content adjusts dynamically to fit the screen size of the device that client uses to login and is ...


